

Open Rooms
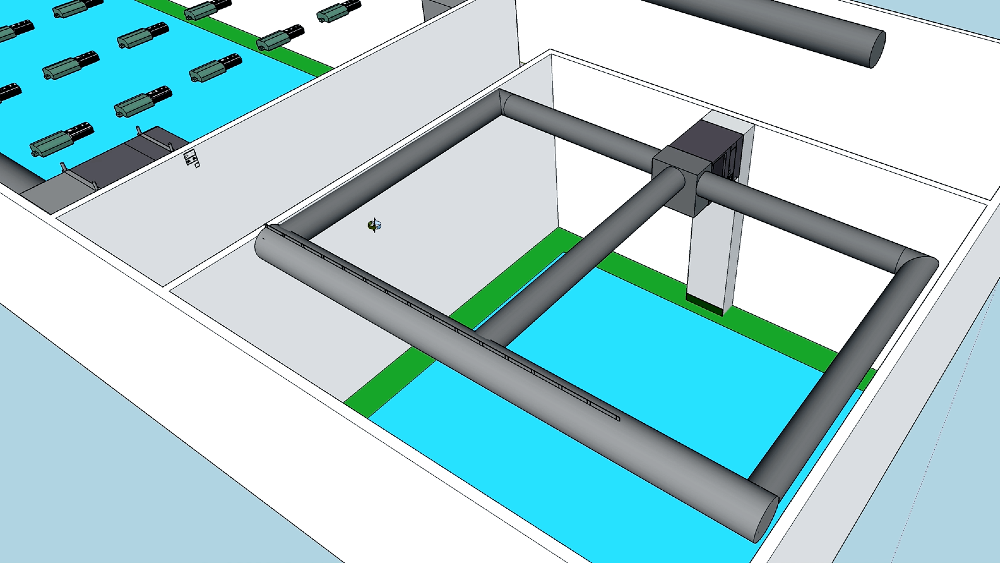
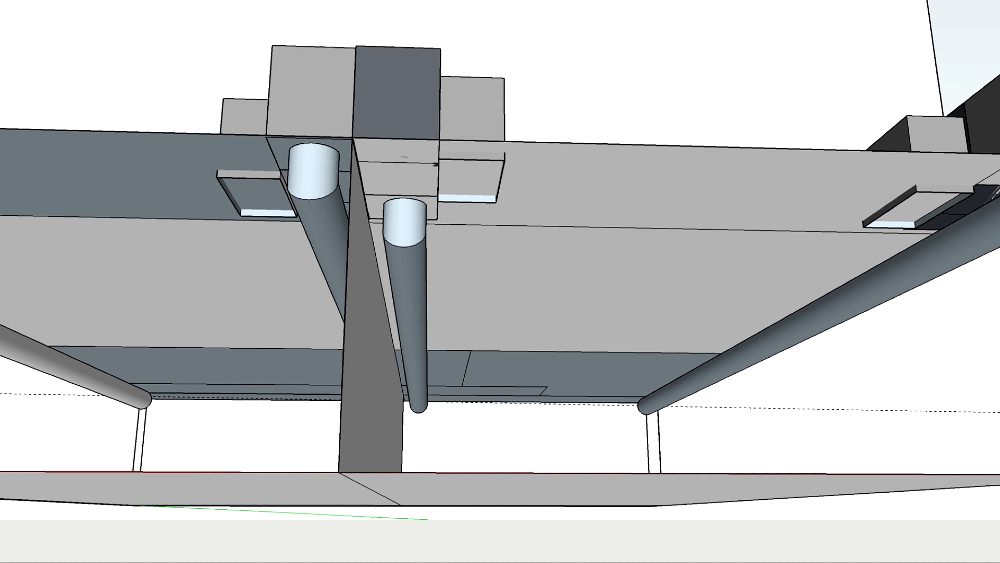
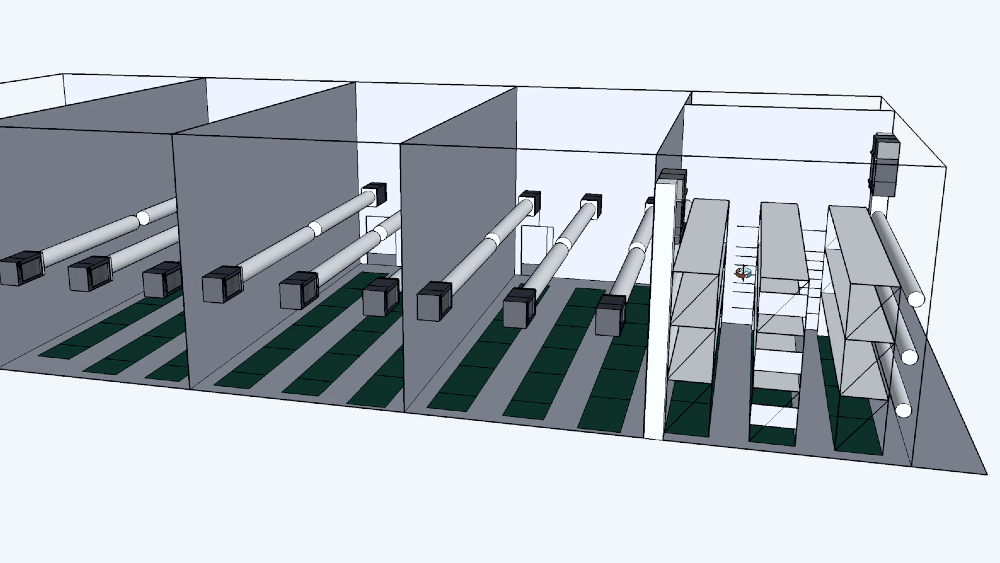
Standard open room set-ups have typically had a Fabric Duct running down the middle, with directional dispersion dictated at slight, diagonal angles of 4 o’clock and 8 o’clock in a 24-foot-wide span, for a default 12-foot throw range from each side. Air hits lower on the walls, trickling down and bouncing off the sides, then enters into the canopy a couple feet above the floor and circles back up into the rest of the room, ensuring critically-important circulation is consistently maintained.
Tighter Racking
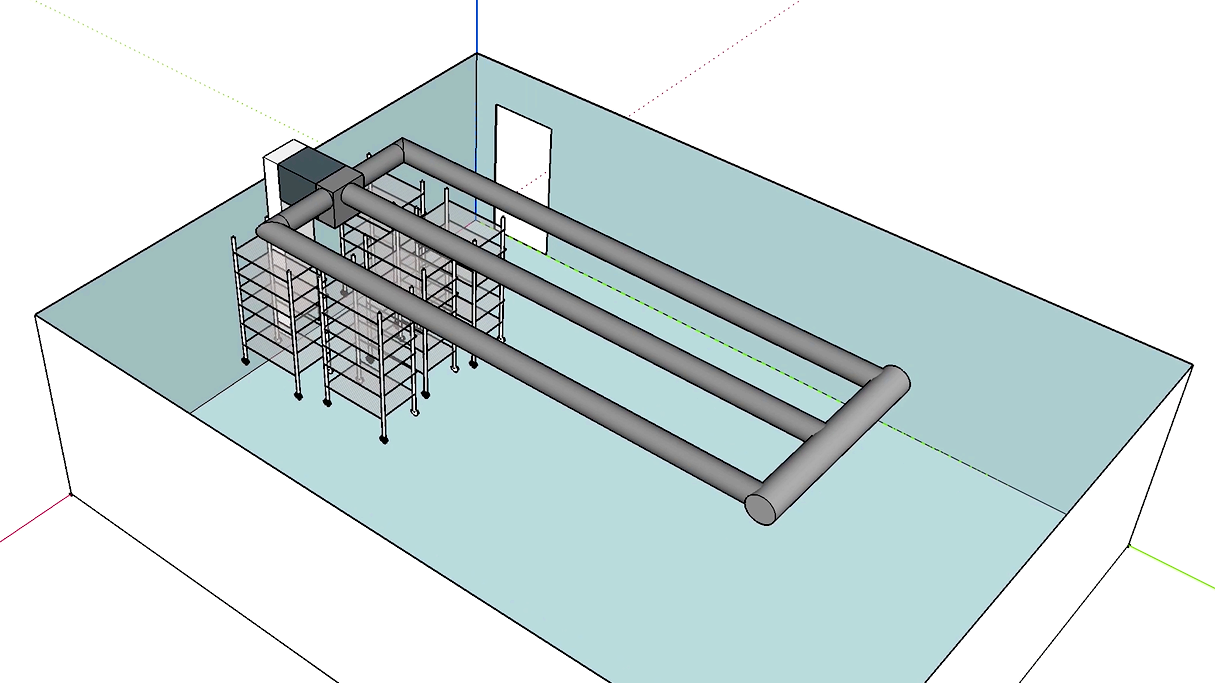
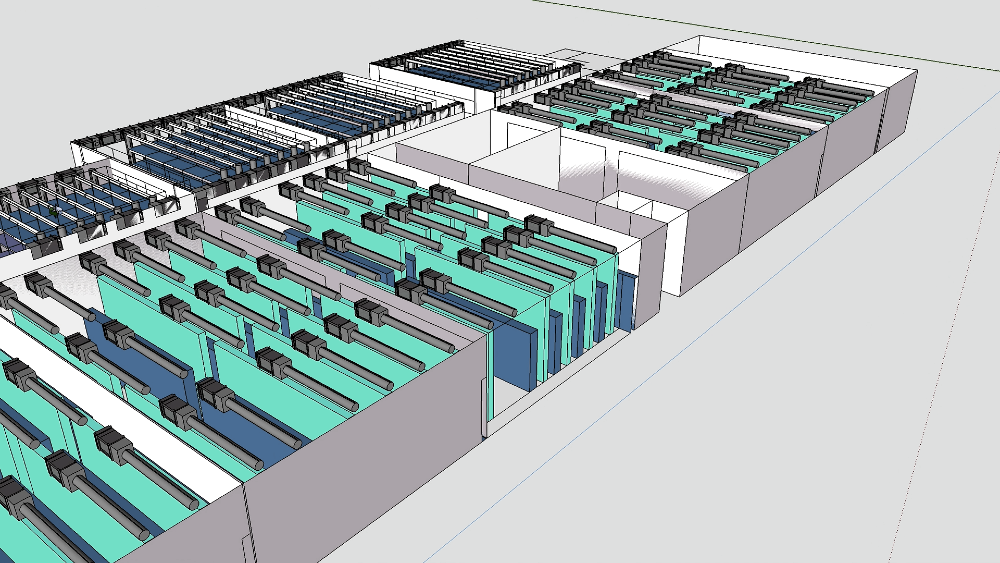
As the industry continues to evolve and real estate costs soar, we’ve seen a major shift towards greater densification in grow rooms, as opposed to traditional grow rooms that used less than 10% of the available volumetric area. In response to these trends, we’ve been adapting and transitioning from a 2D layout to a 3D layout with multiple vertical racks that utilize virtually every cubic inch of space, allowing growers to do a lot more with less.
With that, there are several factors to consider when designing your space.
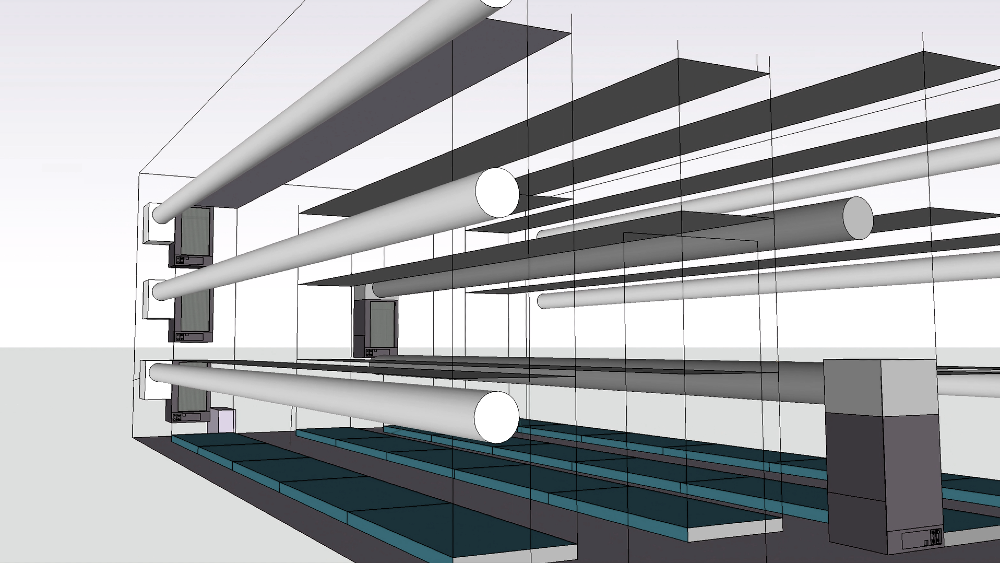
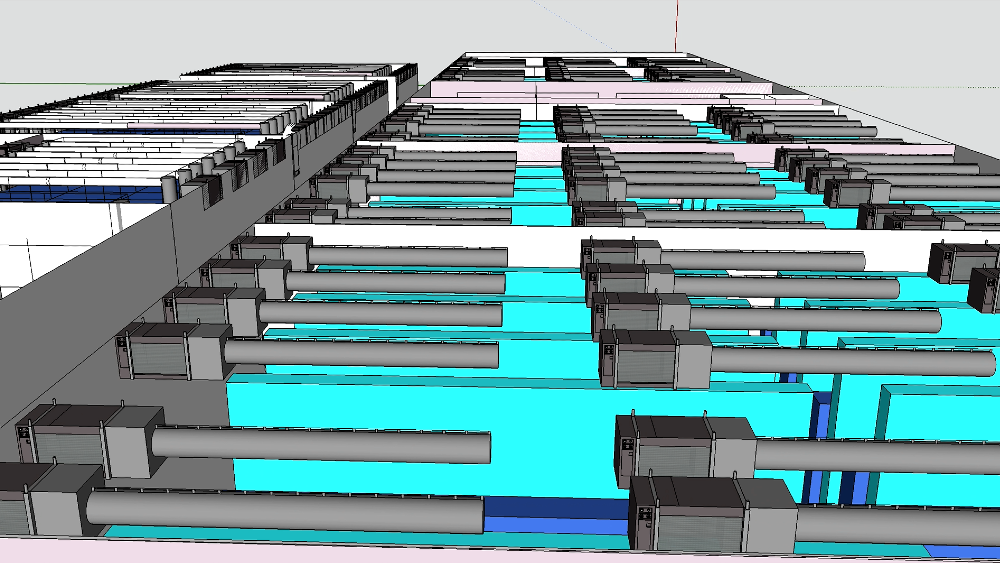
Density
With much denser heat loads than almost any other industry, grow rooms have always posed challenges for engineers struggling to comprehend the level of airflow required for each stage of the grow cycle. Now, moving towards predominantly vertical set-ups with approximately 2-5 times more density has elevated them to the realm of high-end server rooms and crypto-mining spaces with over 300W per square foot. When designing grow rooms at this density level, it’s extremely difficult to not run out of space for basic essentials like ducting, electrical, water runs, and structural support. Then, slide racks take up dedicated aisleways, as the entire 20-ft. structure needs to be able to move side‑to‑side several feet, further exacerbating the situation. As a result, it’s clear that some sacrifices must be made.
Trade-Offs
To ensure a successful set-up, you have to consider which trade-offs you’re comfortable making as preventative problem-solving measures for when challenging situations occur.
The ones that we see most frequently are:
Placing systems where there is little to no access for maintenance or swap-outs
Limited or no ducting for even airflow throughout the racks to push hot air towards the Return Air
Capacity selection based on geographical location combined with limited R-value insulation
Planning
While designing traditional grow rooms consisted of a fairly cookie cutter approach – with higher ceilings, basic heat loads, and a lot of special flexibility – vertical solutions are exponentially more challenging. In turn, this means that the amount of planning should be exponentially more important, as the downside from taking shortcuts would be dramatically deeper.
Spend the time to get it right and you will thrive. Almost everything is possible if you approach it from a first principles perspective. We reinforce that with our motto of taking complex things and making them simple, which we do all of our room designs.
This principled approach means asking the essential questions, which are:
What is the desired layout and how many total BTUs of capacity will there be?
Volts x Amps = Watts / 3000 = Tons of A/C required at 80 °F outdoor temperature with at least R-12 insulation.Based on that previous calculation, how many systems will be in the room?
System placement is critical for both the Supply Air and the Return Air.
When envisioning each level as its own room, how will the heat from the lights makes its way back to the Indoor Air Handler?Will there be sufficient access to the units to change filters, conduct maintenance work, or, in the worst-case scenario, perform a unit swap?
Airflow is the most critical component of a vertical room as it becomes much smaller, especially when considering the small amount of space available between the top of the canopy and the lights at the end of the cycle. Air needs to directly reach the heatsinks of the lights so there is no room for stratification to occur. How can we deliver a tremendous amount of airflow?
Once you’ve answered these 5 questions, you can begin start the tedious process of balancing aesthetics, cost, and installation complexity.
It’s all important, but not all of it will be equal.
Strategies
There are several key factors that are integral to the strategic set-up of airflow in a grow room.
Design by Foundation
Most facility planners decide how many lights they want first, then try to fit in all the foundation equipment later on, since they’re simply doing the math of yield per square foot and hoping to hit their desired number. Unfortunately, this causes a lot of hardship along the way when they’re left with insufficient space for the necessary equipment.
As a grower, would you rather have 15% less of the A-grade product or 100% worth, but of B-grade product? The former is a much better strategy for growing, selling, and sustainable quality brand building.
We advise first getting a rough idea of things like how many watts will be in the space and how much you’ll be feeding, in order to properly lay the foundation with the gear. Then, with that set, the lightning plan can be revised accordingly to match. In addition to expediting the build, this mentality will also make installation and maintenance a breeze, simplifying the experience overall.
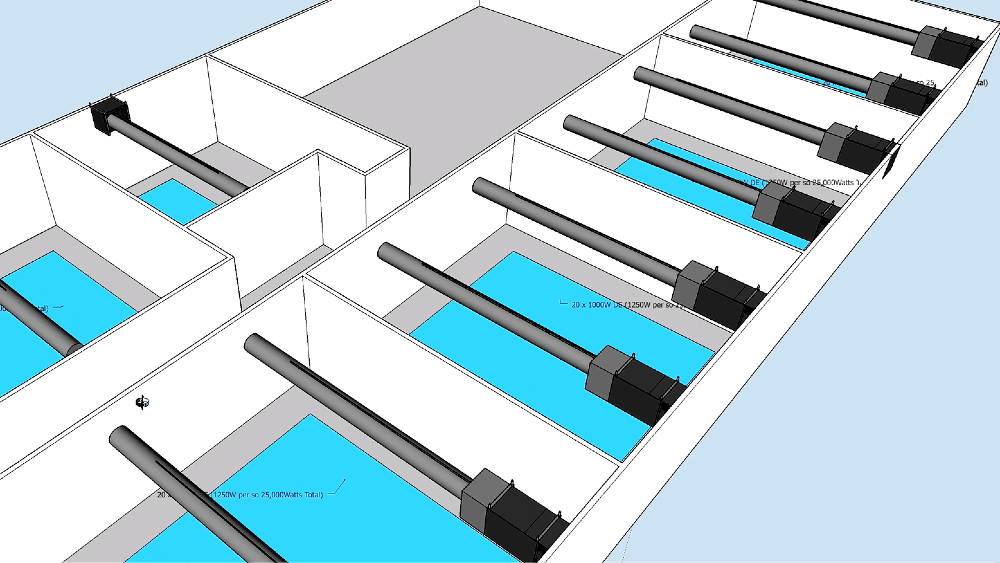
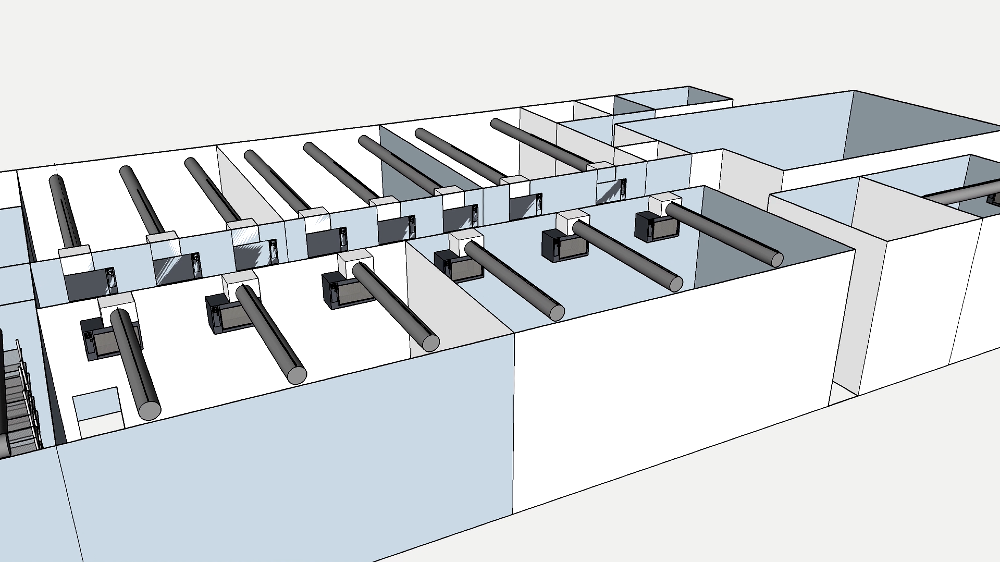
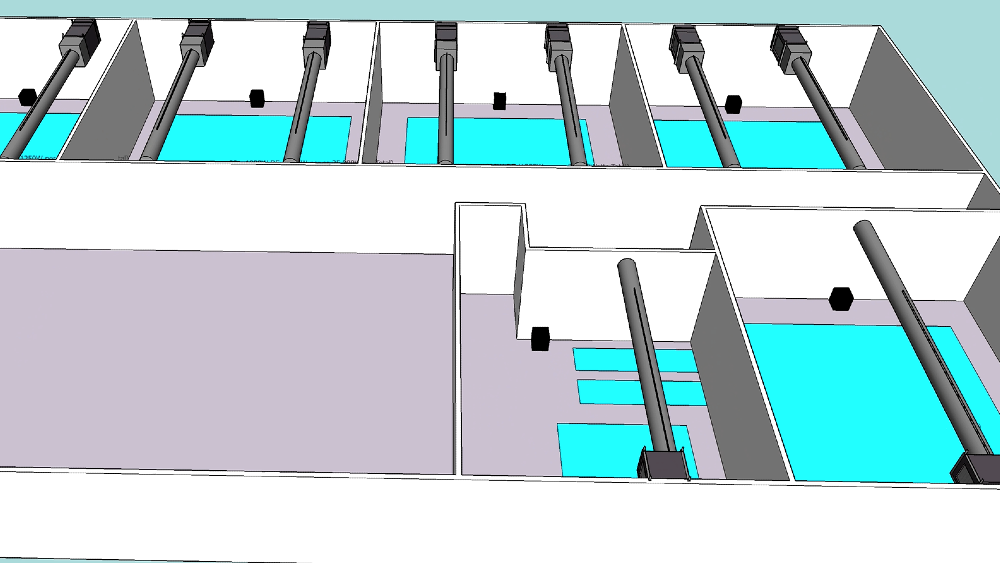
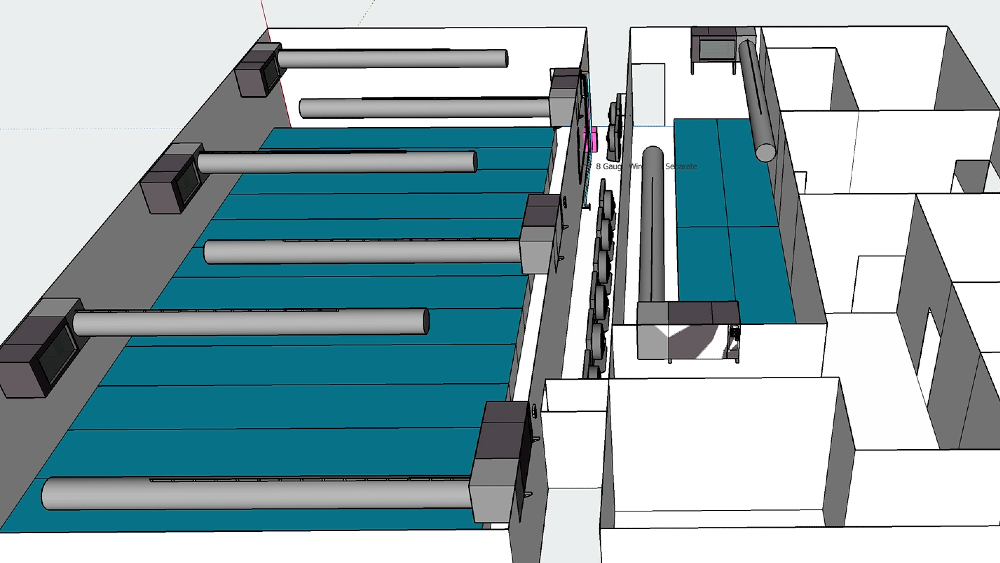
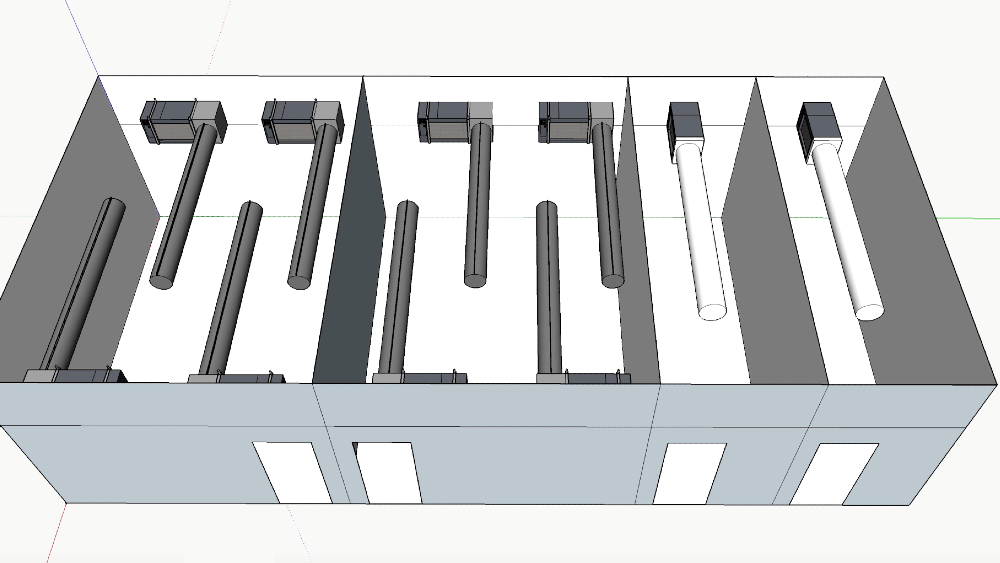
Each Rack Its Own Room
It’s rather critical that every row is at least somewhat independent, as envisioning each rack as its own individual room allows you to more easily get proper airflow throughout your space. Even with so many customizable options in terms of ducting, booster fans, and aisleways, we’ve all too often had customers wanting to place all their gear about 20 ft. up, which usually leads to either massive ducting runs that take up more space than necessary or no runs at all.
To avoid this, it’s essential to plan your room with aisleways or ledges that are large enough to adequately accommodate equipment, or even consider removing a light at the end of each row to make space for the more foundational products, such as air handlers, controllers, and feeders. Higher vertical racking means a much lower head clearance with very limited airflow when plants are at full height.
Consistency Is King
The more pre-emptive action we take to ensure your room is consistently balanced throughout, the more successful your business will be – not just in terms of the quantity and quality of your product, but also from the perspective of operational efficiency, leading to higher margins with less room for error.
With many years of in-depth experience in the industry, we know how to best utilize the tightest possible spaces with the understanding that thoughtful design and simplicity always win in the long run.
On that note, some insightful golden nuggets are:
Keep the room set-up as symmetrical as possible
Design from an installation and maintenance-accessibility point of view
Use as many identical components as possible
Have air move and flow in one direction towards the Return Air, rather than a hurricane effect
Size units appropriately to a room’s heat load and geographical location to maximize dehumidification potential, rather than oversizing
Airflow Management
When designing ducting for a sealed rooms in a grow space, ensuring adequate airflow is extremely important for removing hot and cold spots, in order to prevent microclimates, while also mitigating mold, mildew, and other airborne pathogens. We recommend one complete air turn every 1-3 mins.
Basically, the larger the hole for airflow, the less restriction (static pressure) there is placed on the fan. On a fan curve you can see the performance curve based on a higher or lower static pressure. This will tell you your overall CFM. Next, it the velocity and this will be based on the size of the supply air outlet. Much like putting your thumb on a garden hose the smaller the hole the faster and narrower the stream becomes. In airflow this produces much higher velocities that can become inconsistent and hard to keep even across the entire run so the trick is to find a balance between total CFM or air changes and velocity at which it comes out.
Fabric Ducts
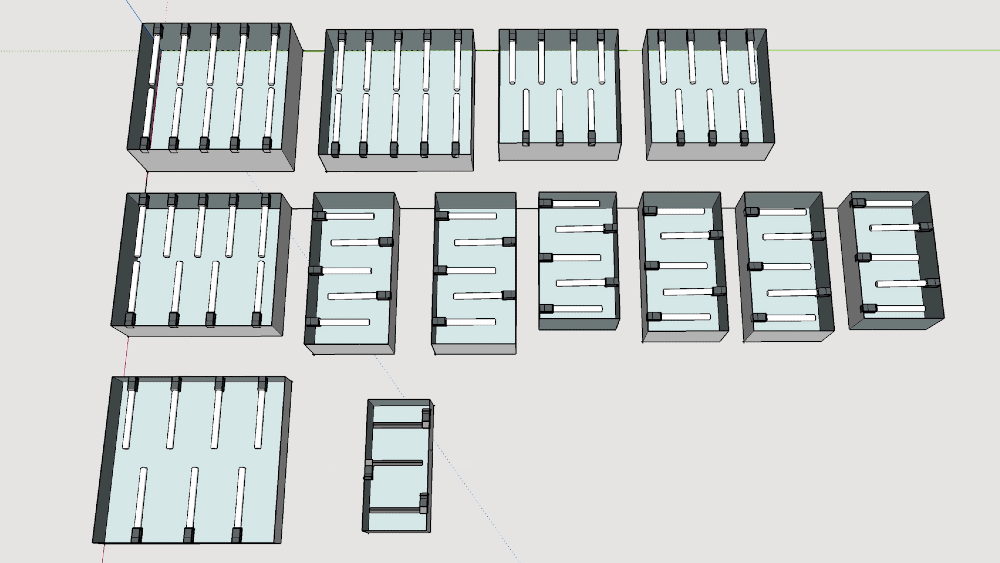
Fabric Ducts are utilized as the ideal solution for increased airflow under these parameters, as they are engineered to disperse the air evenly along their entire length.
Installation time and difficulty are dramatically reduced due to their lightweight composition and aircraft mounting cable with quick-clips.
Additional benefits of Fabric Ducts:
1.5 lb per linear foot
Quick and efficient installation utilizing aircraft cable techniques
Machine washable
Permeats 2 CFM around the entire duct for no buildup of dirt/debris and will not condensate
UL-rated with fire ratings and are machine-washable for food safe production and GMP requirements

Knowing the Math
Our rule of thumb is to remain under 1500 FPM so that the Fabric Duct can maintain even dispersion at or below this rate, whereas anything over can cause low pressure pockets, causing it to flap uncontrollably.
Then, with the target CFM and velocities selected, the next is to determine duct sizing based on these figures.
For example, our 5-ton Evolution Series systems are designed to run 3400 CFM at 0.3” of static pressure, as demonstrated in the chart.
Indoor Blower Fan Static Pressure
So our target duct size for a single run directly off the system would be 20” in diameter. If space is an issue for duct runs you can get creative with the duct runs and split them into various sizes and lengths to get your desired effect. This can be done as long as you meet the same overall surface area of the single duct run. In our example of 20” single run duct the surface area is calculated us Pi R 2. (3.14 x (10x10))= 314 square inches.
Outdoor Condenser Axial Fan Curve
Inspiration


WANT in-depth information about Sealed room ENGINEERING?
Ready to set up airflow design with customized ducting?
We respect your privacy.
Please refer to our Privacy Policy for more information.